
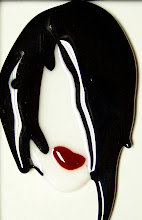
She gave me a picture to go off of, and hopefully (fingers crossed), it will turn out similar to this:

After many discussions about how I would create a similar clock like this, we are putting a twist on it and I'll be adding a swinging pendulum with a slice of pizza hanging from the bottom!
So, I thought I would blog about the process of this clock and how I am making it. This way, also, I can keep my customer up-to-date on what I'm doing!!!!
So, first off, I start with a wedge of clay:

I then roll it out with my huge rolling pin. After getting it big enough to cut (this will be about a 9-inch pie) I then cut the circle out. I used my kiln shelf for the basis of how big I could actually make this. Since I have a rather small kiln, about 9 inches is as big as I can fit inside my kiln.


After measuring and putting a hole in the center of the clay for the clock hardware, I then scored the clay to make the actual "slices" of pizza and making the squares to go around. I'm very careful to measure everything, so I don't end up with a lop-sided pizza. I also hate to have pictures of my hands taken - all my crafting has definitely taken its toll - notice the nice scab on my finger on my right hand (from my solder gun!) and my non-existent nails!!!! I usually have band-aids on my fingers from all my glass cutting! What we artists go through! Well, its all worth it.

OK....here's where I finished up for today. After it dries to a leather hard consistency, I can clean-up around the edges and such. Then, its off to air dry completely - usually a few days.

STAY TUNED............


3 comments:
I am looking forward to seeing how this turns out!
Very cool. I love the step by step of your process shots.
What a neat project! I can't wait to see how yours turns out!
Renee :)
Post a Comment